
Easy Instructions for Generating Restore Points on Your Windows 10 Device
Easy Instructions for Generating Restore Points on Your Windows 10 Device
To do a System Restore in Windows 10, you need to create a restore point first. Just follow steps below to create a restore point in Windows 10.
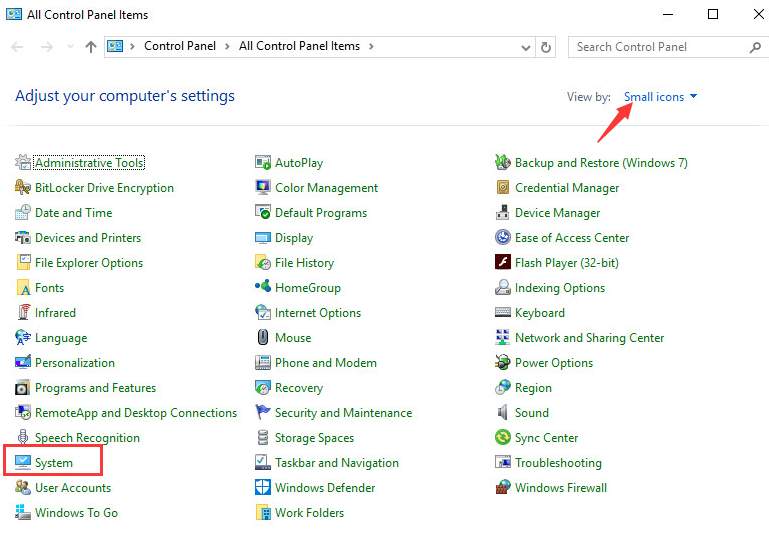
1. OpenControl Panel .
2. View bySmall iconsand click onSystem.
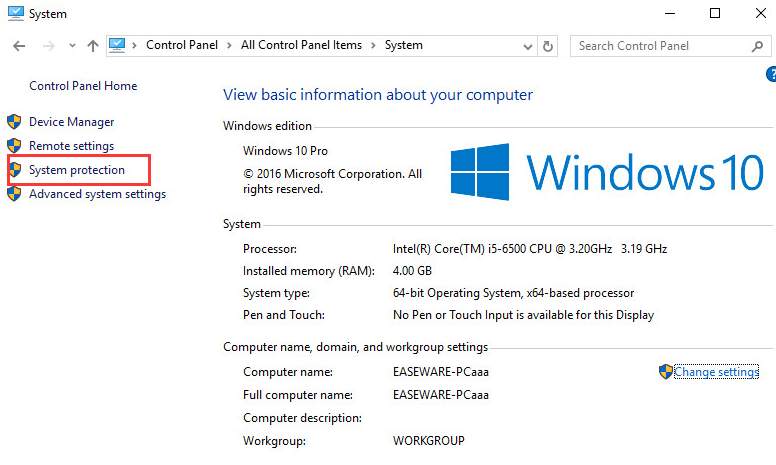
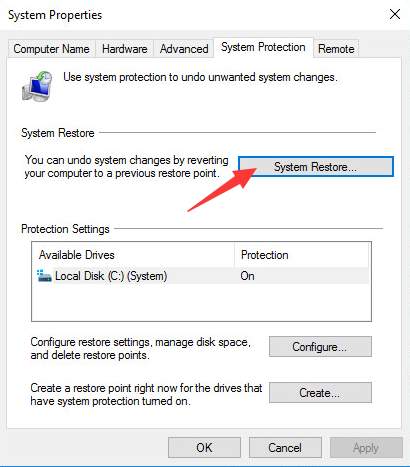
3. ClickSystem Protection in left pane.
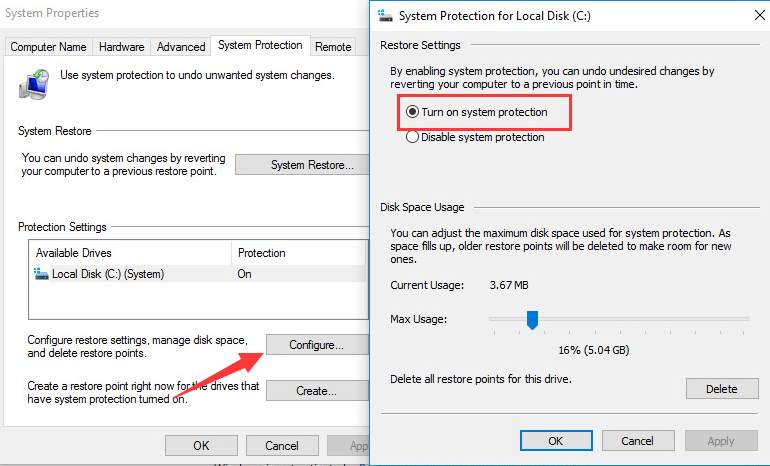
4. UnderProtection Settings, ensure theProtectionfor the drive that you want to create a restore point is On (Note the drive must have Windows installed on.).

If not, select the drive and clickConfigure to turn it on.
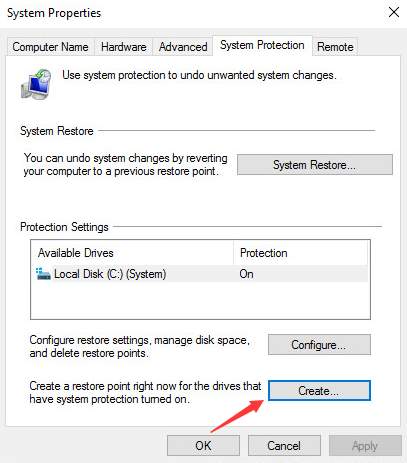
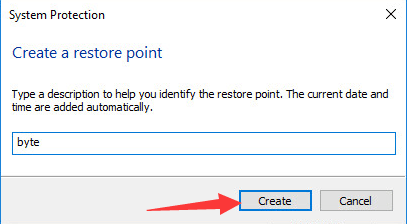
5. ClickCreatebutton.
6. Type a description in the box, which will help you identify the restore point. (In my case, I type “byte”.) Then clickCreate button. After that, Windows will start creating the restore point.
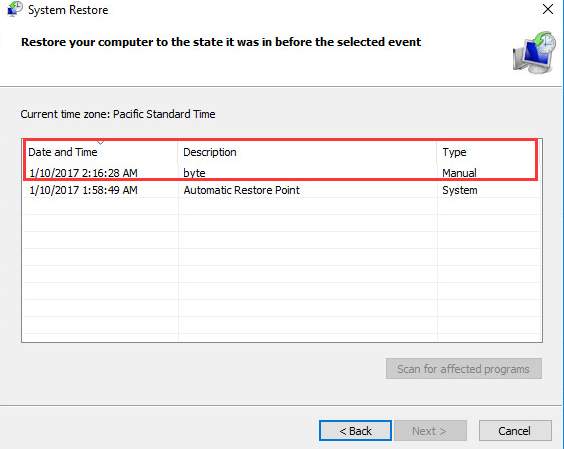
If you want, you can check whether the create point is created successfully:
Open System Properties again and clickSystem Restore .
In my case, the “byte” restore point has been created successfully.
Also read:
- [New] 2024 Approved Transcending Boundaries The VR Evolutionary Journey
- [New] Hacks for Hassle-Free Podcast Streaming for 2024
- [New] Your First Step in Advanced Photo Editing Snapseed
- [Updated] Exploring the Lowest Rates on Cloud Services, 2024 Edition
- [Updated] In 2024, Outro Aesthetics Selecting Templates, Any Budget
- 2024 Approved Syncing Scores YouTube Music's Role in Multimedia Content
- 完美上線不用付費,使用Movavi將WMA改造成MPEG影片
- Escaping Gmail? Here Are the Top 8 Alternatives to Consider
- Guia Completo: Preserve Seu Desempenho Na Equipe Através Da Gravação PC - Soluções Simplificadas Com a Ferramenta Movavi
- How To Restore Missing Contacts Files from Motorola Moto G Stylus 5G (2023).
- In 2024, Advanced Guide to Clear, Cut, and Ship Video
- In 2024, Combining Zoom & Facebook Live A Step-by-Step Guide
- In 2024, Easy Ways to Manage Your Oppo K11 5G Location Settings | Dr.fone
- In 2024, The Art of Cinema Mastering the Best 5 Camera Tips
- Softer Sounds Guide for PC/OS Users
- Title: Easy Instructions for Generating Restore Points on Your Windows 10 Device
- Author: Edward
- Created at : 2025-03-02 19:25:16
- Updated at : 2025-03-03 19:19:49
- Link: https://vp-tips.techidaily.com/easy-instructions-for-generating-restore-points-on-your-windows-10-device/
- License: This work is licensed under CC BY-NC-SA 4.0.