
Maximize Productivity on Your Mac with Native Strategies for Streamlined Window Arrangement
Maximize Productivity on Your Mac with Native Strategies for Streamlined Window Arrangement
Quick Links
Unlike a lot of people in my line of work, I’ve only ever used a single MacBook without any external displays connected to it. Despite jumping between a dozen or more apps throughout the day, I manage to keep everything in order—and easily within reach—using macOS’s built-in window management tools.
1 Automatically Resize Windows
Let’s start with the simple stuff. You probably already know you can click and drag from one of the corners of an app window to resize it, but did you know there are a couple of ways to automatically resize windows as well?
First of all, macOS offers a little extra help when it comes to perfectly aligning your windows. While dragging to resize a window, you’ll notice a slight pause in the resizing when you come up against the edge of another window. This is to help you snap the edges together to maximize your screen real estate. You can also use the same feature to create multiple windows of the same height right next to each other.
Your browser does not support the video tag.
But much better than that, if you hold the Option key while hovering over the green Full Screen button, you’ll see a few more resizing options appear. “Zoom” expands a window to fill the whole screen, while the two options beneath will move and resize a window to fill the left or right sides of the screen. Unlike Full Screen and Split Screen modes (which we’ll dive into shortly), these options don’t hide the Dock or menu bar and allow you to keep switching between other apps on the same screen.
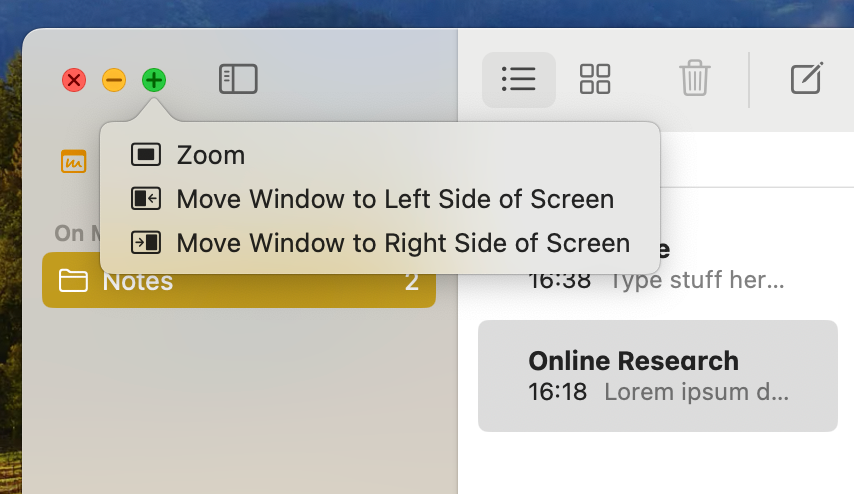
If you want to resize a window back to how it was before using these options, just select the option again or click the “Revert” button in the same menu and your window will revert to its original size and placement.
2 Full Screen
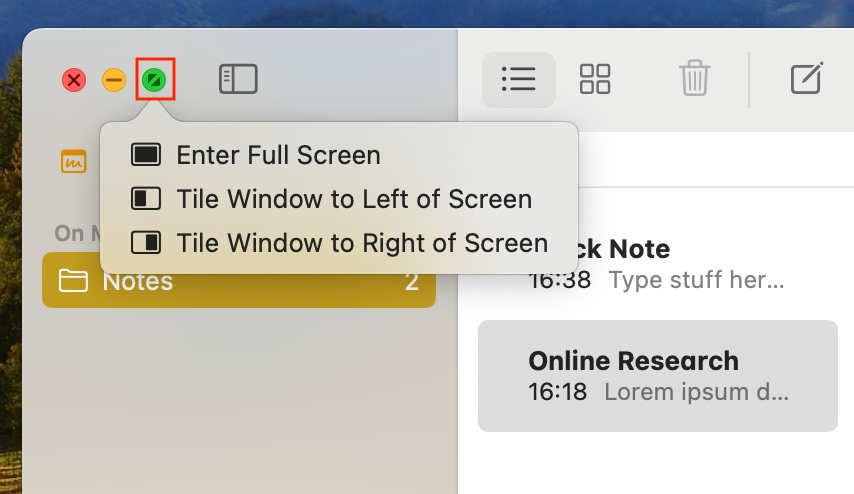
To make the most of my relatively small MacBook screen, I practically live in Full Screen mode. To enter Full Screen, just click the green button in the top-left corner of an app window. If the button is grayed out, it means that app doesn’t support it, which happens occasionally.
After entering Full Screen mode , the window expands to fill your entire screen, even hiding the Dock and menu bar to reclaim more valuable space at the top and bottom of your display. If you want to get to the Dock or menu bar , just hover your mouse at the top or bottom of the screen and it’ll reappear.
Your browser does not support the video tag.
What I love most about this is how easy it is to swipe between multiple full-screen “Spaces” on the trackpad. Just swipe left or right with three or four fingers (depending on your settings) and you’ll be able to fly between different apps and your desktop, taking advantage of your entire display with each one. You can also use the arrow buttons while holding Control to switch between them, or press Command+Tab to easily switch between apps if you can’t find them by swiping.
Your browser does not support the video tag.
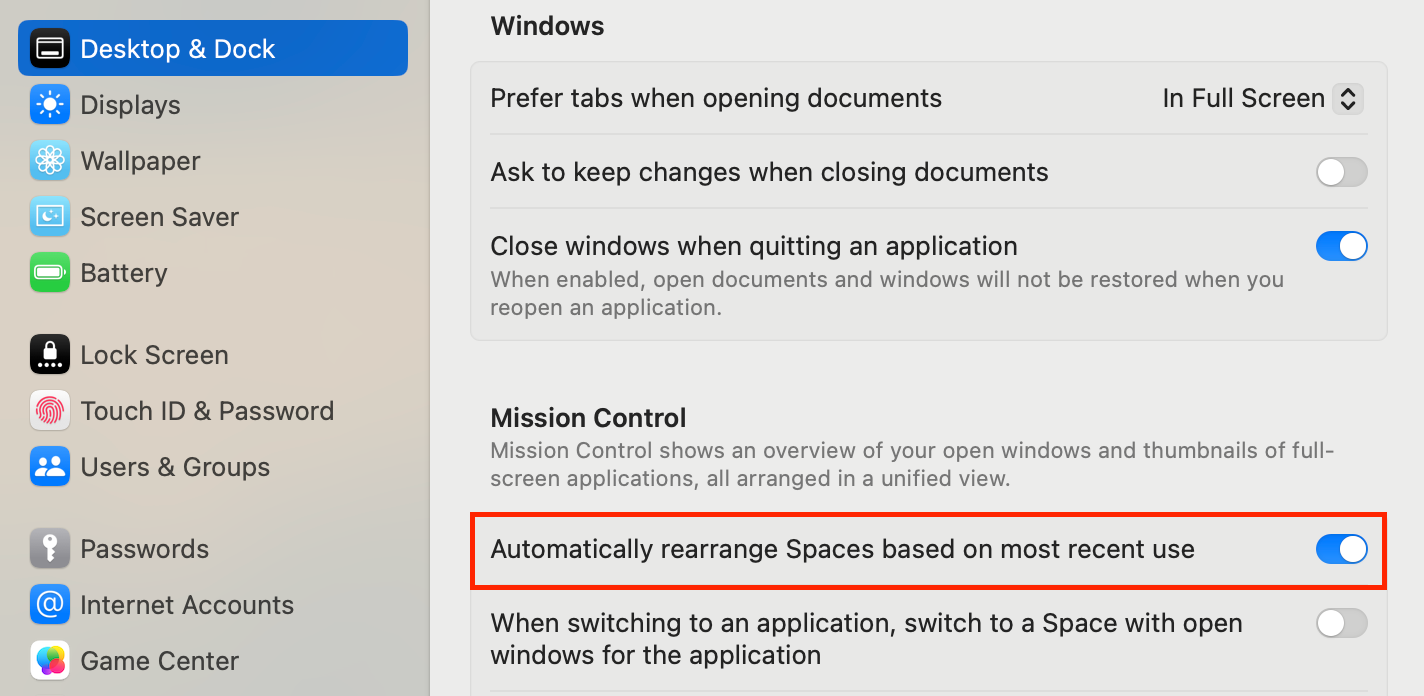
I suggest going to System Settings > Desktop & Dock and enabling the option to “Automatically Rearrange Spaces Based on Most Recent Use” under the “Mission Control” heading. This will make it so your last used full-screen app is only a swipe away, and the least used ones stay more out of the way.
3 Split Screen
If you need to see two app windows at the same time, but want to them to fill the whole screen while doing so, you can use Split Screen mode . You can do this with two different apps or two windows from the same app, although, as with Full Screen mode, not all apps are compatible with it.
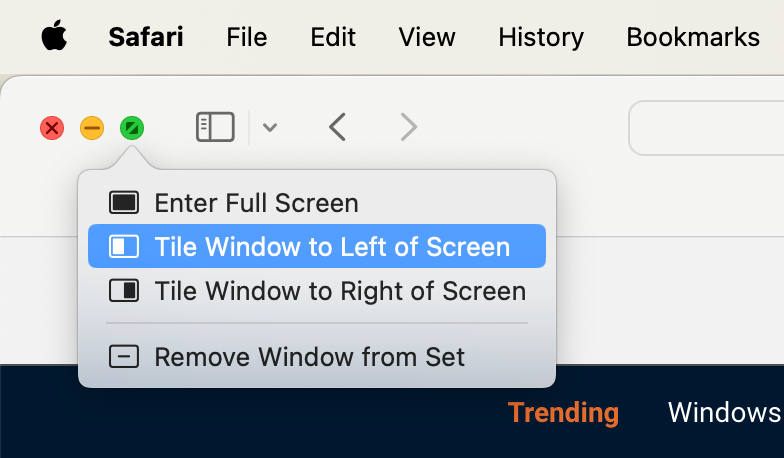
Start by opening a normal window for each app you want to use in Split Screen mode. Then click and hold on the green button for either app and choose to “Tile Window to Left of Screen” or “Tile Window to Right of Screen.” That window will move and resize to fill the entire left or right side of the screen, then you’ll be able to select an option from all your other available windows to fill the other side of the screen.
Just like Full Screen mode, Split Screen will fill your entire display with the two apps, hiding the Dock and menu bar in the process. Just move your mouse to the top or bottom of the screen to make them reappear. You can then swipe between all your Full Screen and Split Screen Spaces with three or four fingers on the trackpad.
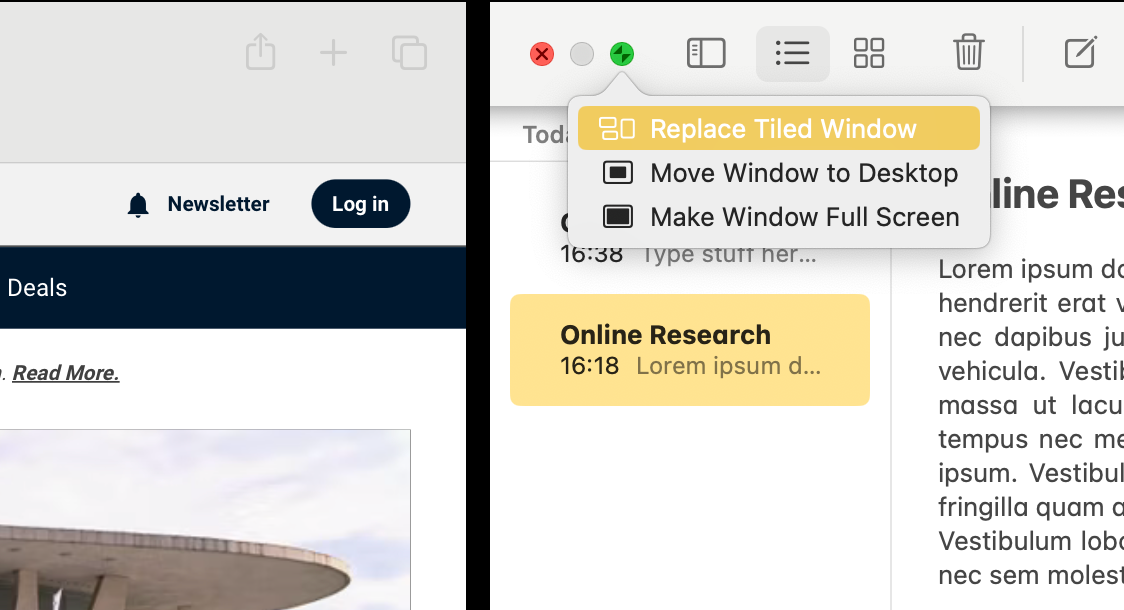
Click and drag the black bar in the middle of the screen to resize the two apps, although macOS doesn’t give you completely free rein on how wide or narrow you make apps. To switch the placement of the apps, just drag and drop the top of the window from one side of the screen to the other. And if you want to swap out one app for another, move your mouse to the top of the screen, then click and hold on the green button and choose “Replace Tiled Window.”
4 Mission Control
Mission Control is the wonderful glue that holds together all the window management features I’ve covered so far. To activate it, hit the Mission Control key (which is F3 on most Mac keyboards) or swipe up on the trackpad with three or four fingers (depending on your settings). The screen will zoom out and you’ll be able to see all of your app windows next to each other, with Full Screen and Split Screen apps in a row of Spaces at the top of the screen.
Your browser does not support the video tag.
If you’re ever struggling to find a particular app window, just open Mission Control to find and select it.
From Mission Control, click and drag to rearrange the Spaces at the top of the screen, making it easy to swipe between them in a more logical order. Just make sure you disable the setting to automatically rearrange Spaces if you want to do this; go to System Settings > Desktop & Dock and scroll down to the “Mission Control” section to do so.
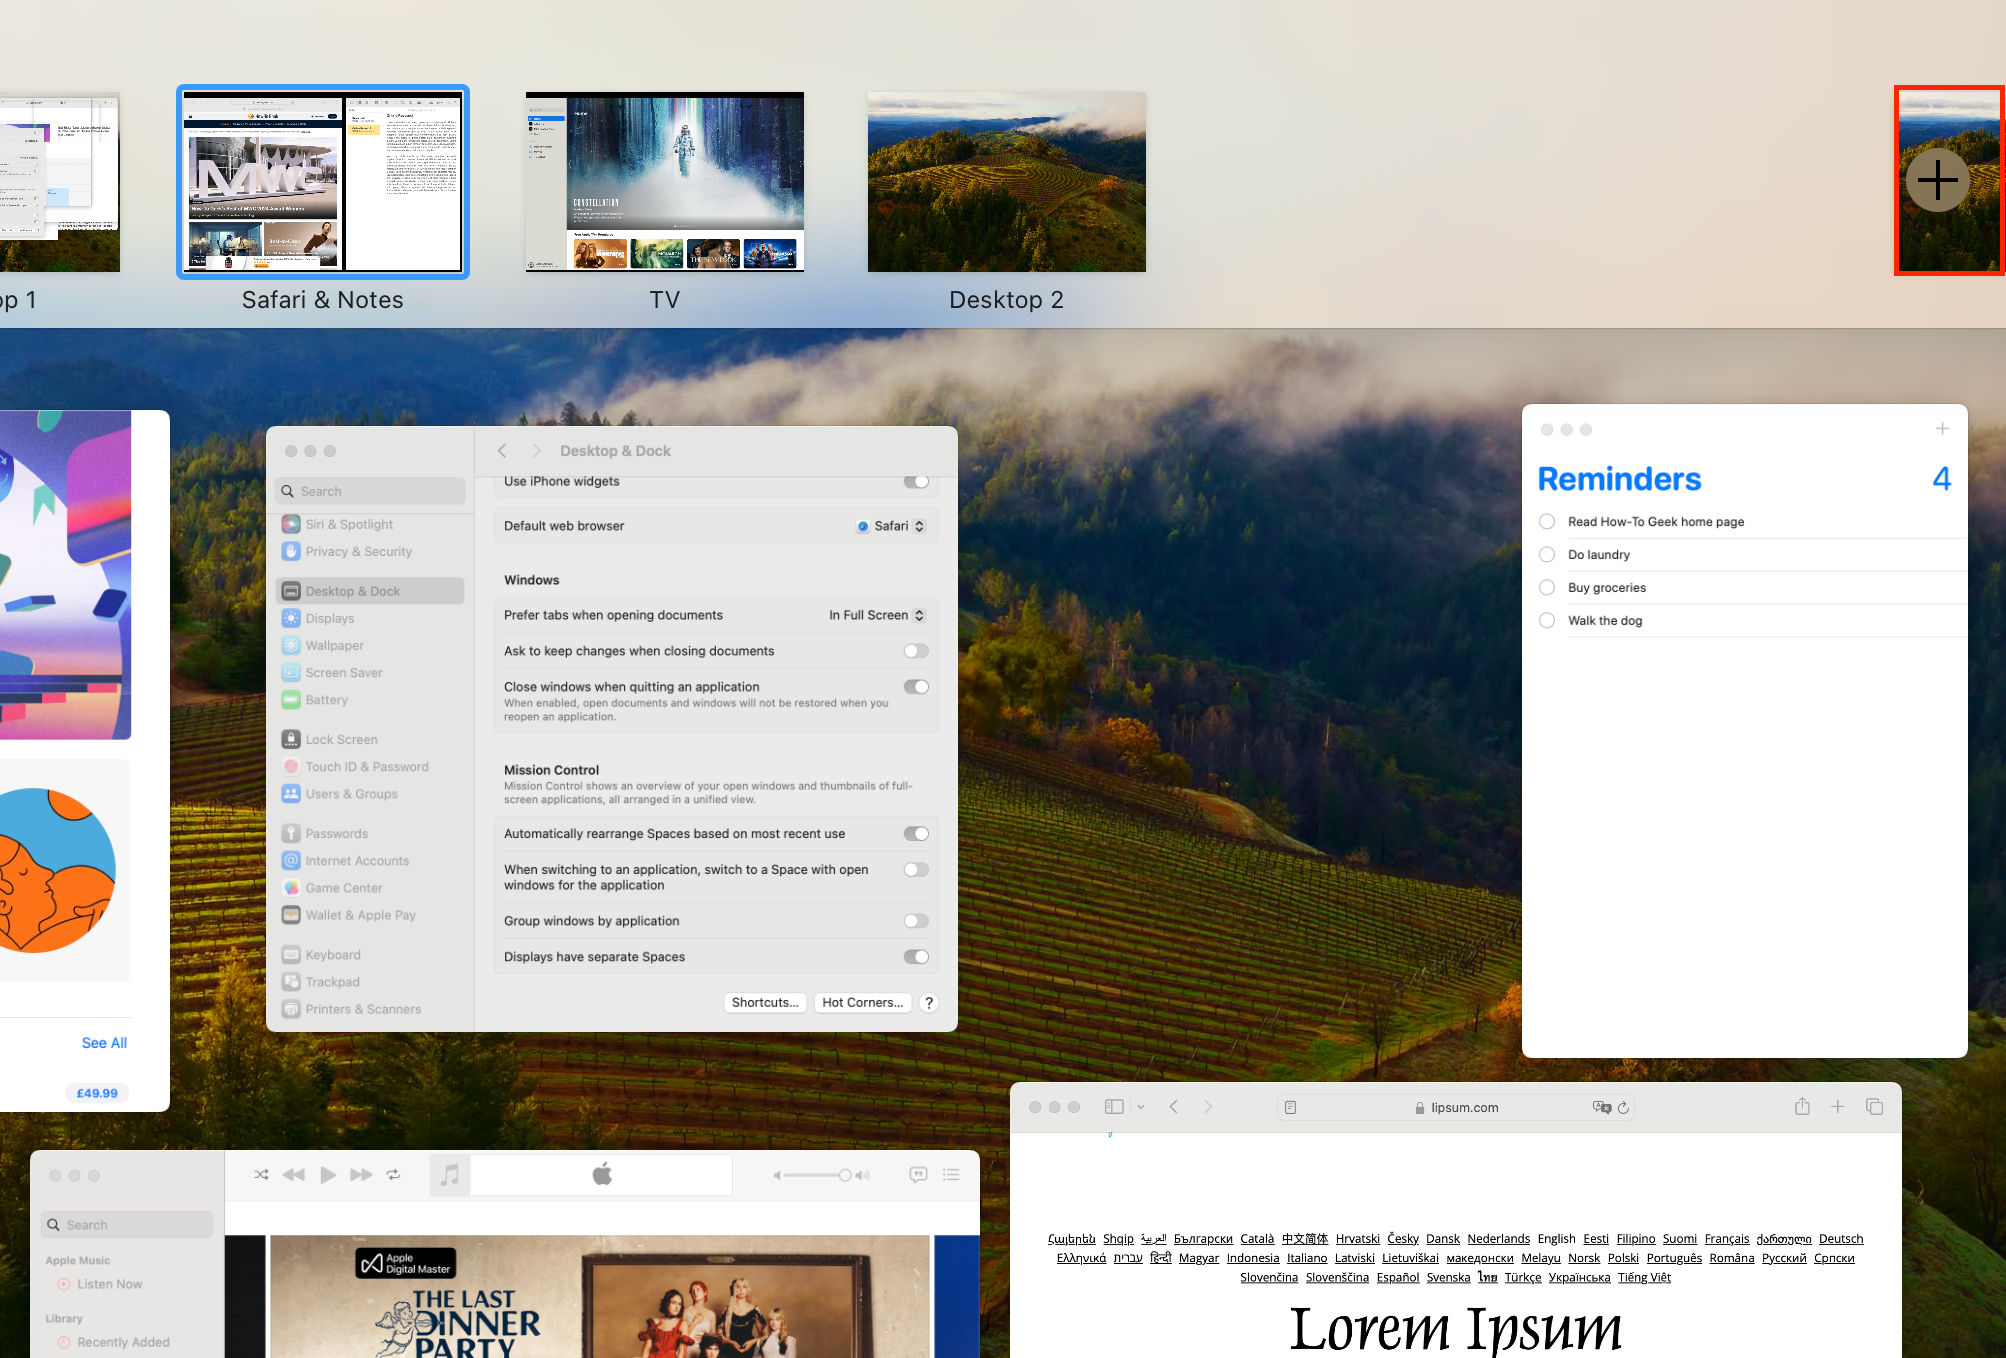
Perhaps the best aspect of Mission Control is that you can use it to create multiple virtual desktops, which is handy if you want to separate different groups of app windows. To do this, open Mission Control and click the plus (“+”) button in the top-right corner. A new desktop will be added to your row of Spaces, which you can swipe between along with Full Screen apps. You can then click and drag windows from your active desktop to another one at the top of the screen.
5 Stage Manager
Something of a black sheep among the Mac’s window management features, Stage Manager started life as an iPad feature and was ported to the Mac with macOS Ventura. It has proven to be divisive among Mac users and, to be honest, I haven’t found much use for it myself. But it’s another option that’s worth experimenting with as there are some cool aspects.
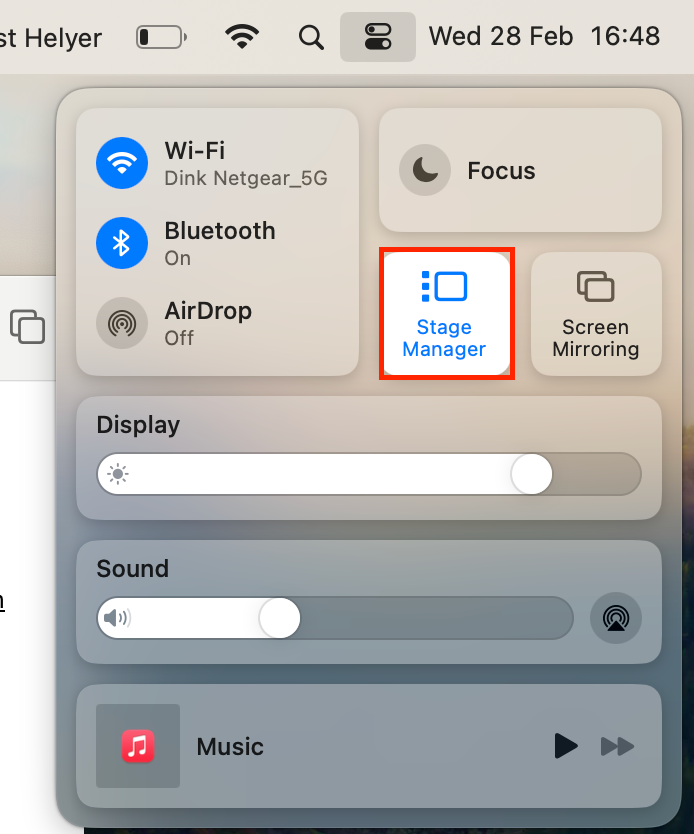
To turn Stage Manager on or off, open the Control Center and toggle the “Stage Manager” button.
When you turn it on for the first time, all your non-active apps will swoop to the edge of the screen in a zoomed out view. You can then click and drag to create different groups of app windows—Stages—and switch between them from the edge of the screen without losing your window placements.
Your browser does not support the video tag.
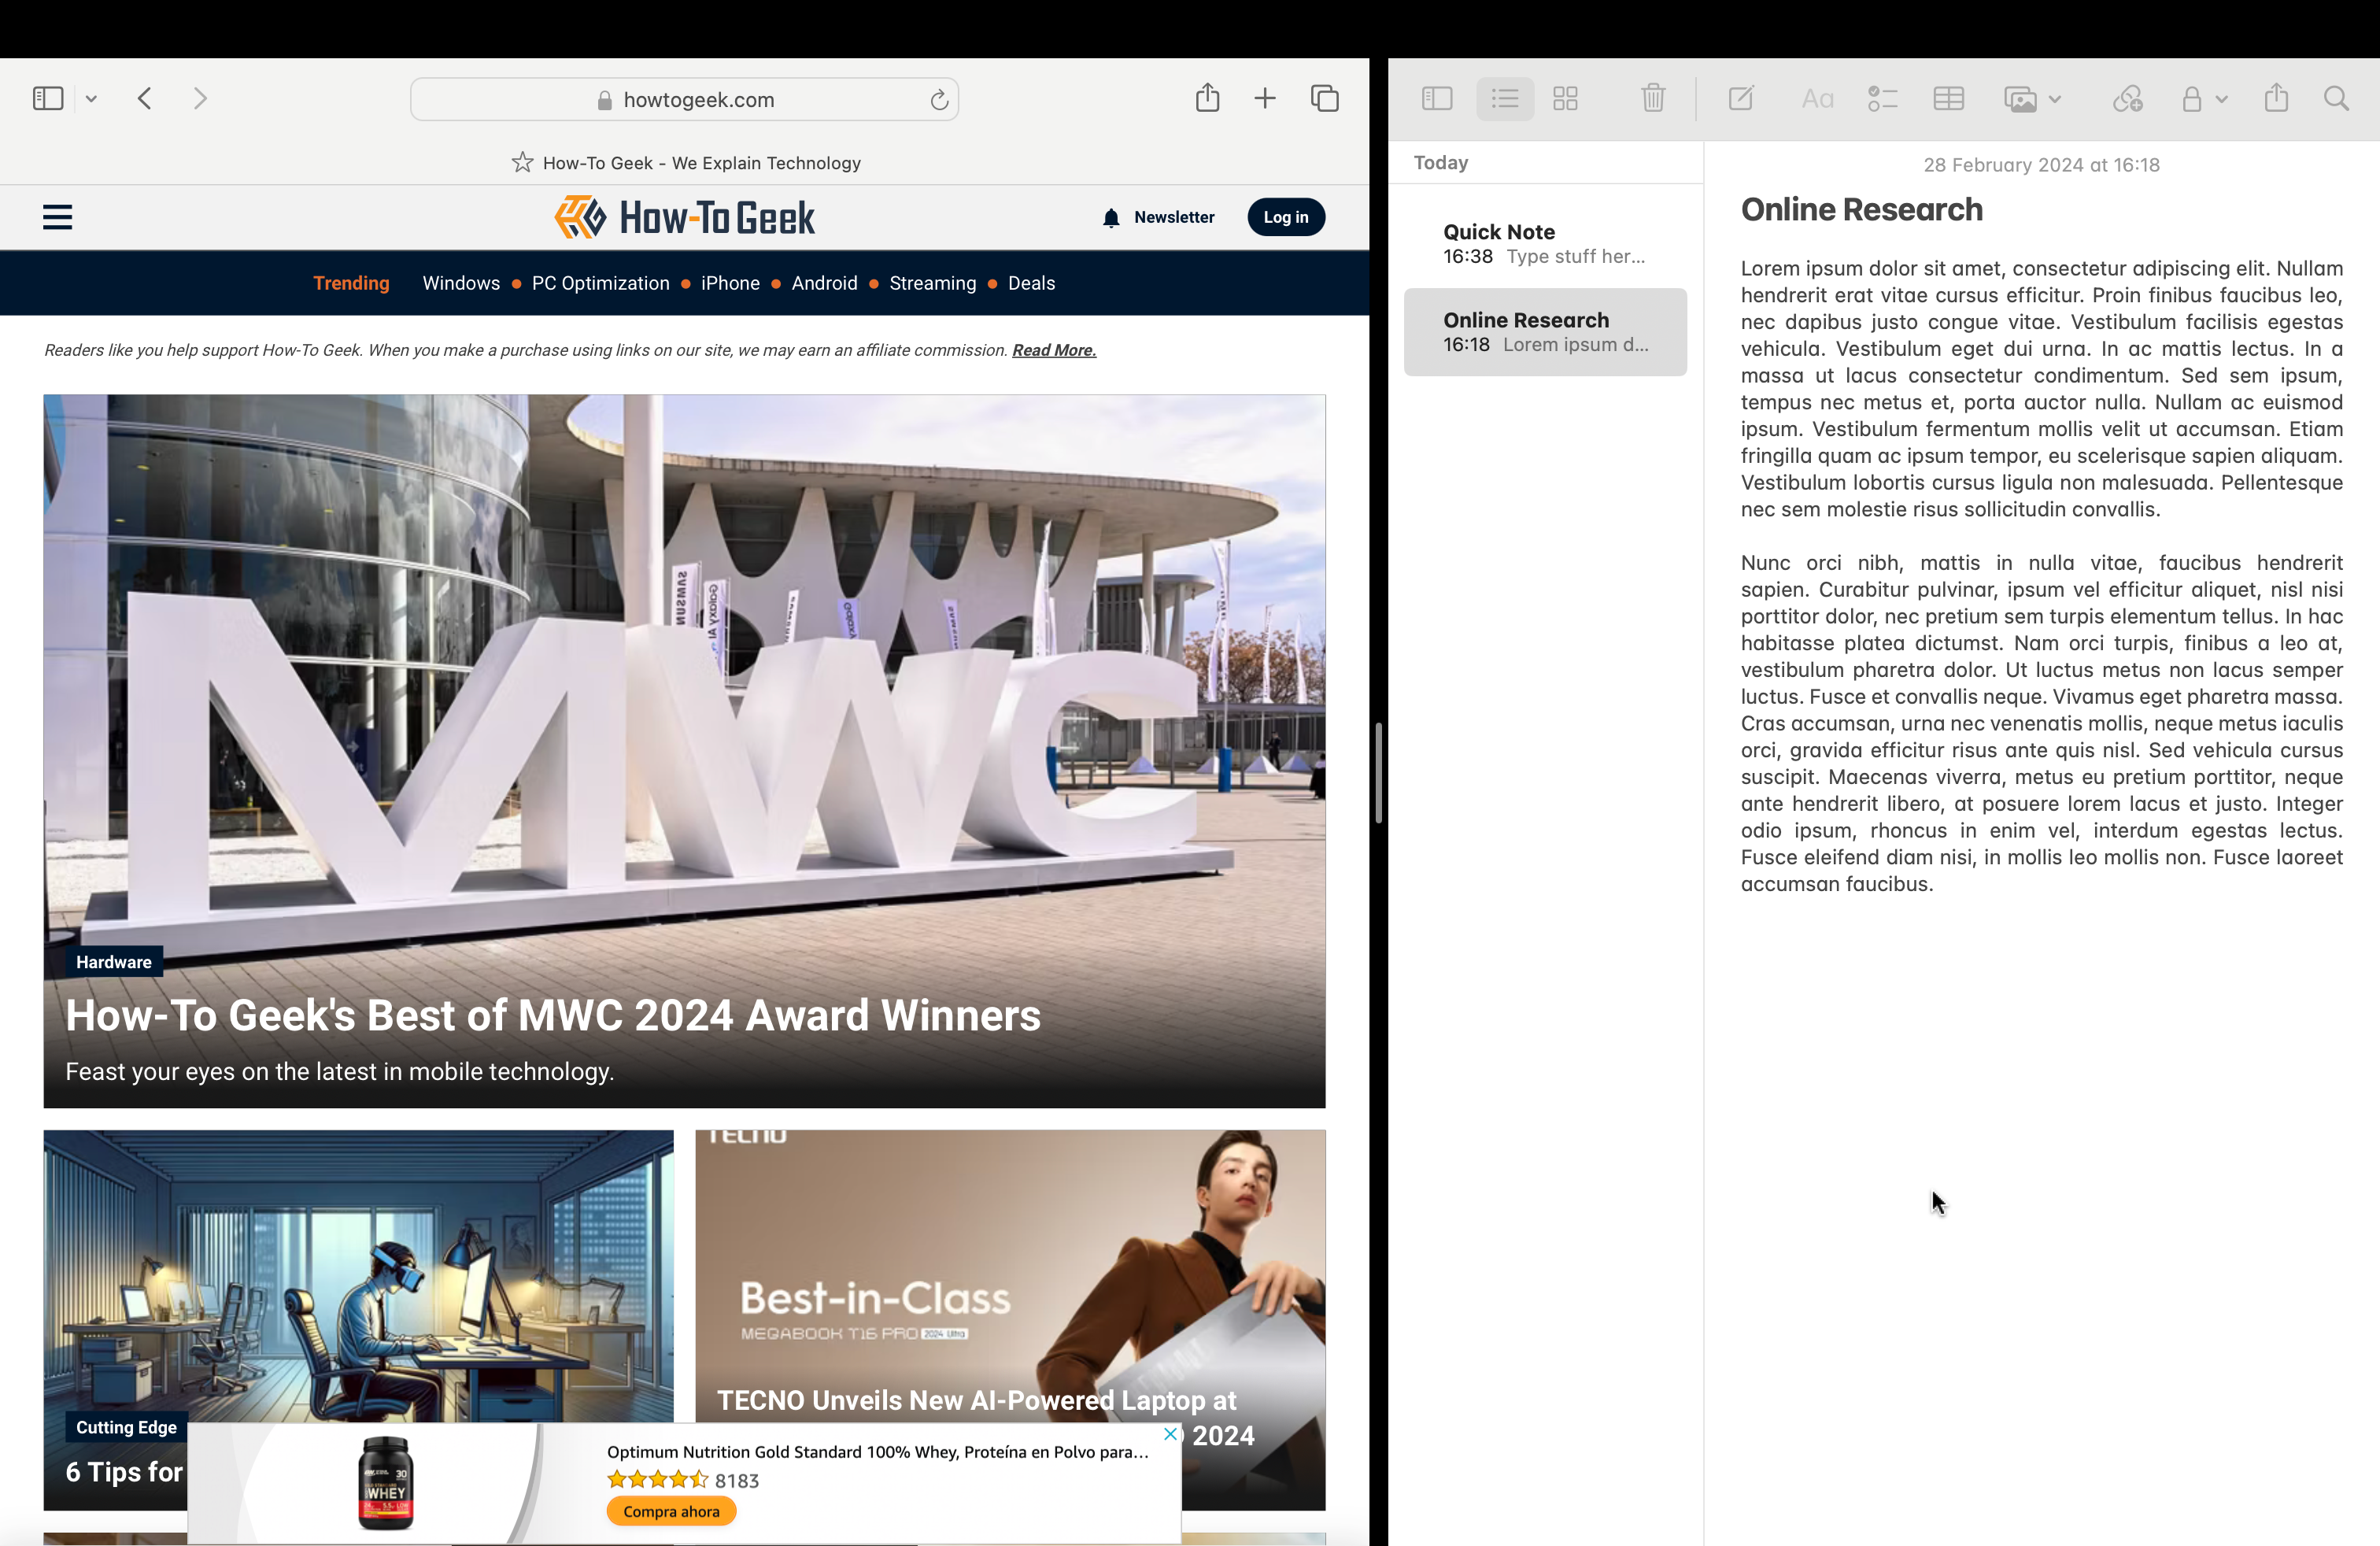
This offers all kinds of options for grouping app windows together in a way that makes sense for your workflow. For example, you could create a Stage with a web browser and the Notes apps opened side by side, for some online research. Then you could switch to another stage with your emails and instant messaging apps for some communication.
Although I prefer using multiple desktops with Mission Control for this, Stage Manager might be more to your liking, especially if you’re used to using the same feature on an iPad.
6 Quick Note
The last feature I’m going to mention is a little different as it only works with a one app: Notes. The Quick Note feature allows you to keep a window from the Notes app hidden in the bottom-right corner of your Mac screen at all times. If you ever want to jot something down, just move your cursor to the bottom-right corner and a new note window will appear on top of your other windows.
Your browser does not support the video tag.
You can even read your last Quick Note from Full Screen mode, although if you click the note to make changes it’ll open in desktop view. This is an excellent way to keep an extra window easily at hand, without actually losing any screen space to it or making your desktop more cluttered than it needs to be.
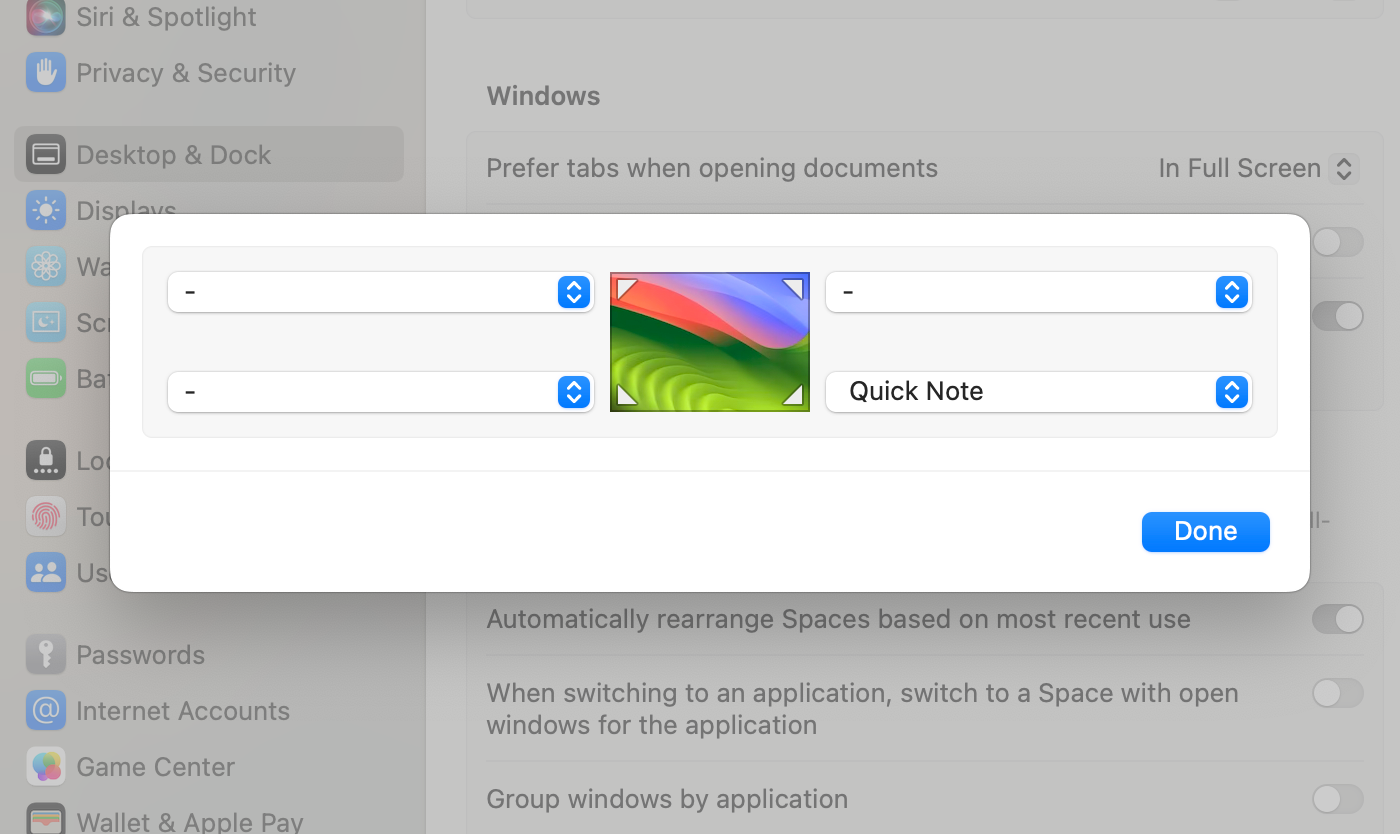
To enable Quick Note, go to System Settings > Desktop & Dock and then click the “Hot Corners” option at the bottom. Open the bottom-right dropdown menu and select “Quick Note” from the options.
In the Notes app settings, you can also choose whether to create a new Quick Note each time or to “Always Resume to Last Quick Note” and keep working on the previous one.
So there you have it, these are all the most useful built-in features you can use to keep your Mac windows more organized. Apple offers some incredibly intuitive options, but there are still more ways to keep organized using third-party apps, like Magnet , which give you far better tools for resizing and snapping windows to different parts of your screen.
Also read:
- [New] 2024 Approved Seamless Technique Inserting a Direct URL Into TikTok Bio
- [New] In 2024, Unveiling the Secrets to Blurring iPhone Photos A Comprehensive Guide
- [New] Thrive on InstaVid A Guide to Creating a Solid Video Marketing Framework for 2024
- [New] Unlocking the Secrets to Increasing Video Engagement on YouTube
- [Updated] 15 Best Facebook Analyzers to Increase Sales for 2024
- [Updated] In 2024, Constructing Captivating Valorant YouTube Thumbnails
- [Updated] Innovative Techniques to Make a Mark with Your GoPro Studio Edits
- [Updated] Overhaul Overflow Cutting-Edge Techniques for Massive TikTok Drafts
- [Updated] The Ultimate Guide to Facebook-Friendly Xbox Play
- [Updated] Unveiling Hidden Potential A Deep Dive Into Background Eraser in PS for 2024
- Calls of Tomorrow - iPhone's Audio Archive
- In 2024, Merge Videos Without Logos Best 7 Software Options
- In 2024, The Echo Chamber of Creativity Crafting Compelling Podcast Stories
- In 2024, Unlock Samsung Galaxy XCover 7 Phone Password Without Factory Reset Full Guide Here
- Title: Maximize Productivity on Your Mac with Native Strategies for Streamlined Window Arrangement
- Author: Edward
- Created at : 2025-01-17 19:15:16
- Updated at : 2025-01-23 20:51:22
- Link: https://vp-tips.techidaily.com/maximize-productivity-on-your-mac-with-native-strategies-for-streamlined-window-arrangement/
- License: This work is licensed under CC BY-NC-SA 4.0.