
Step-by-Step Instructions: How to Project Your Laptop's Screen Onto Your TV
Step-by-Step Instructions: How to Project Your Laptop’s Screen Onto Your TV
Quick Links
- Connecting a Laptop to a TV With a Cable
- Connecting a Laptop to a TV Wirelessly
- Use DLNA/UPnP for Video Content
- Drawbacks to Using a TV With Your Laptop
- Still Want to Buy a TV?
Key Takeaways
- Connect your laptop to a TV for a big screen experience using an HDMI cable, USB-C to HDMI adapter, or for especially old laptops and TVs a VGA cable.
- Configure display settings to ensure the resolution and positioning are correct once you’ve connected in Windows or macOS display settings.
- Using a TV as a secondary display for video content and gaming makes sense, but for serious “monitor work” like word processing and web browsing we recommend a computer monitor instead.
Don’t settle for the small screen, connect your laptop to a TV and enjoy movies, games, and more on the big screen. You could even use a space TV as a secondary monitor for watching YouTube while you work. Here are some tips to get you started.
Connecting a Laptop to a TV With a Cable
The most common connection type to connect a modern laptop to a TV is HDMI, a digital standard that carries both video and audio. The older HDMI 2.0b standard has enough bandwidth for 4K resolutions at 60Hz (with HDR signals), while newer HDMI 2.1 or better devices can do 4K at 120Hz or 8K at 60Hz (and more).

Hannah Stryker / How-To Geek
Most new TVs are restricted to HDMI as an input method since dropping support for analog connections used in older devices like VCRs and early home consoles. Fortunately, this type of output is common, with many laptops having a full-sized HDMI output or a smaller Micro HDMI port instead .
You can use a Micro HDMI to HDMI adapter or a cable that features both HDMI and Micro HDMI connection types to bridge the gap between these devices.
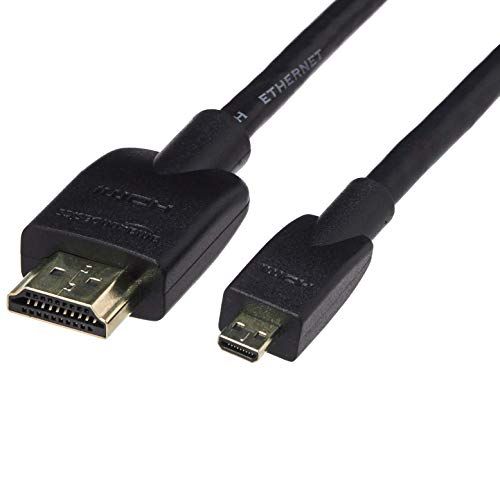
Amazon Basics Micro HDMI to HDMI Cable
This cable will let you connect devices with Micro HDMI ports to displays with a full-size HDMI port. However, they’re becoming less widespread, and most newer devices will include Mini HDMI instead.
If your laptop doesn’t have an HDMI port, you might need to use a USB-C to HDMI adapter instead. This is the case with older MacBook models that heavily relied on dongles in favor of ports. Apple backtracked on this with the 2021 MacBook Pro , but MacBook Air owners will still need an adapter.
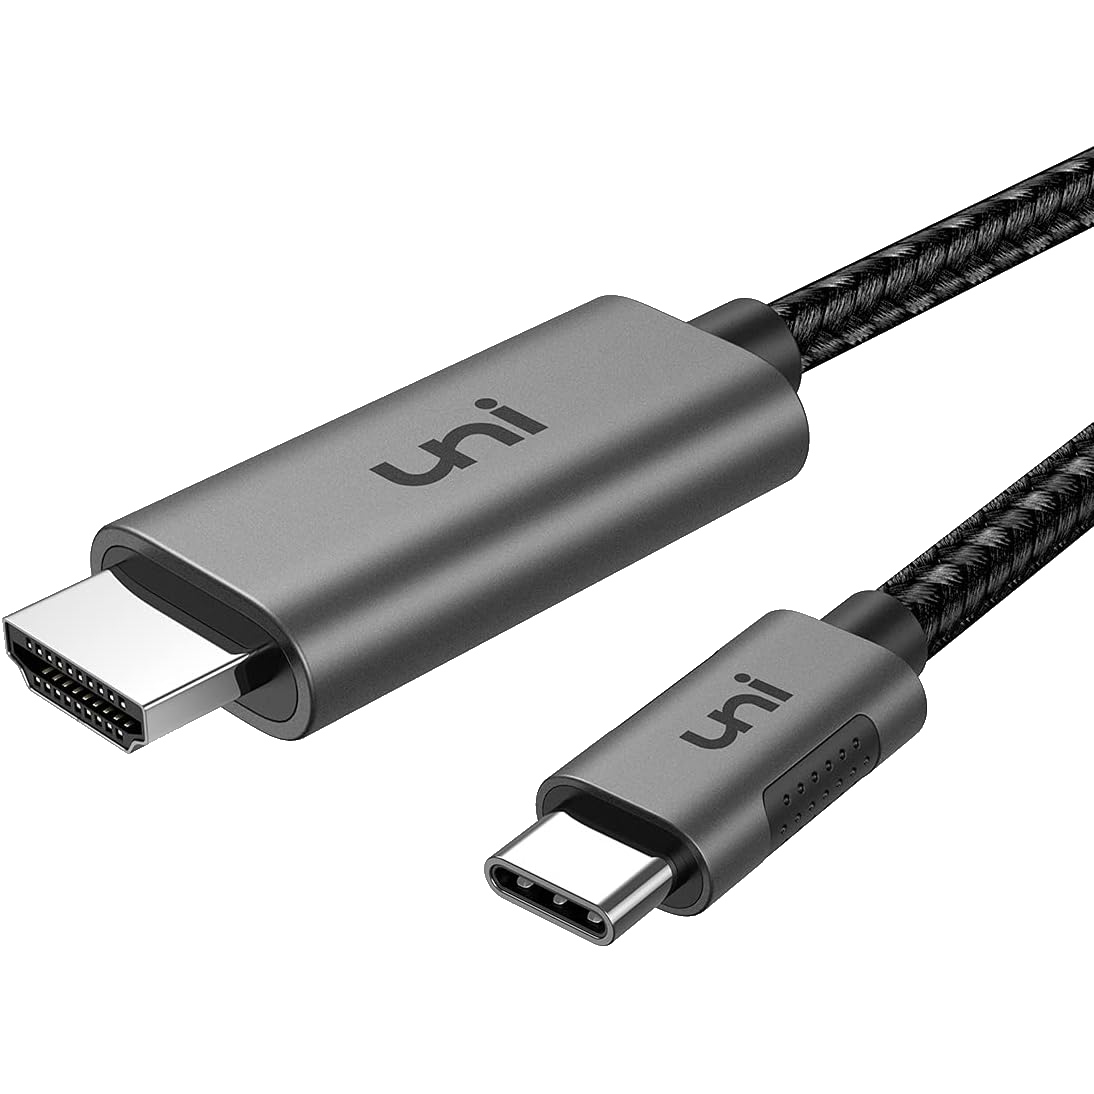
Uni USB-C to HDMI Cable
$13 $20 Save $7
If you need to connect your device to an external display, this USB-C to HDMI cable is worth a look.
The other “common” connector of choice that has traditionally been used on televisions is the VGA connector. This older analog connection was once the connector of choice for computer monitors. Newer TVs won’t have this connection type, and neither will newer laptops.
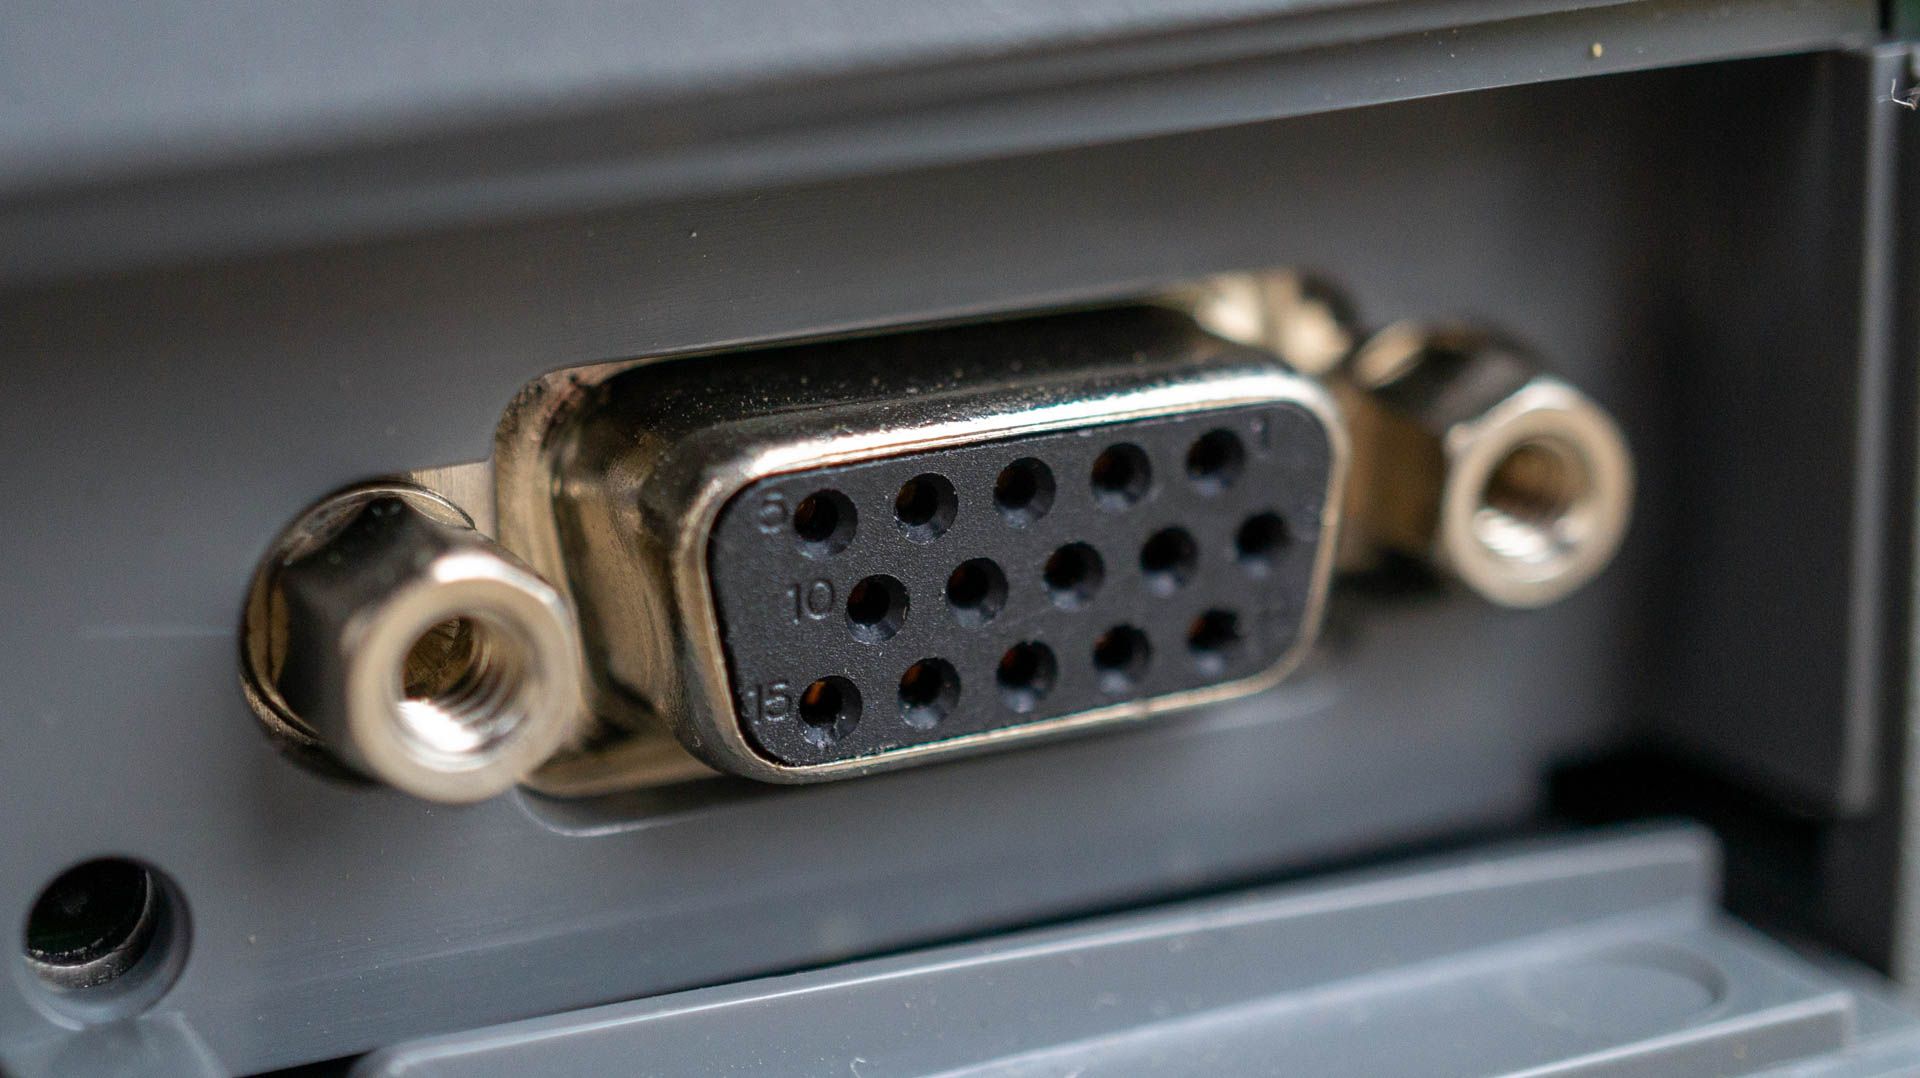
Corbin Davenport / How-To Geek
On an older TV, the VGA port is often labeled as the “PC” input. If you have a newer laptop with an HDMI output, you can use an HDMI to VGA adapter or get a USB-C Multiport Adapter with VGA instead.
Since VGA only carries video, no sound will be carried through to the TV. To overcome this, you’ll need to use a cable to carry audio from your laptop’s stereo (headphone) port to whatever compatible input your TV has. There are very few reasons to use VGA instead of HDMI, so opt for HDMI whenever possible.
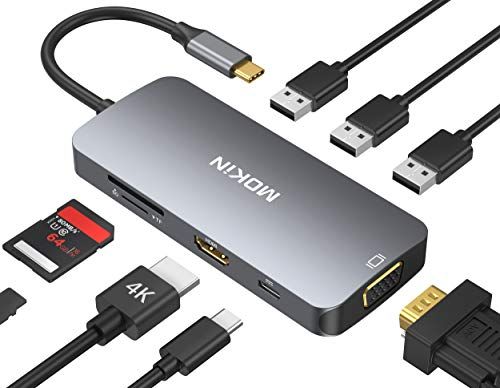
Multiport USB-C Hub
USB-C Multiport Adapter with VGA
Add VGA and a ton of other ports to your MacBook with this USB-C multiport adapter.
Connecting a TV is simple once you’ve chosen your cable type. Simply plug your cable into your laptop and stick the other end in the relevant port on your TV.
With your laptop powered on, turn on the TV and use the remote to switch to the correct input method (you’ll see this listed next to the port you used on the TV). You should see your desktop appear on the TV, though there may be other settings to change before things work as you’d expect.
Configure Your Display Preferences
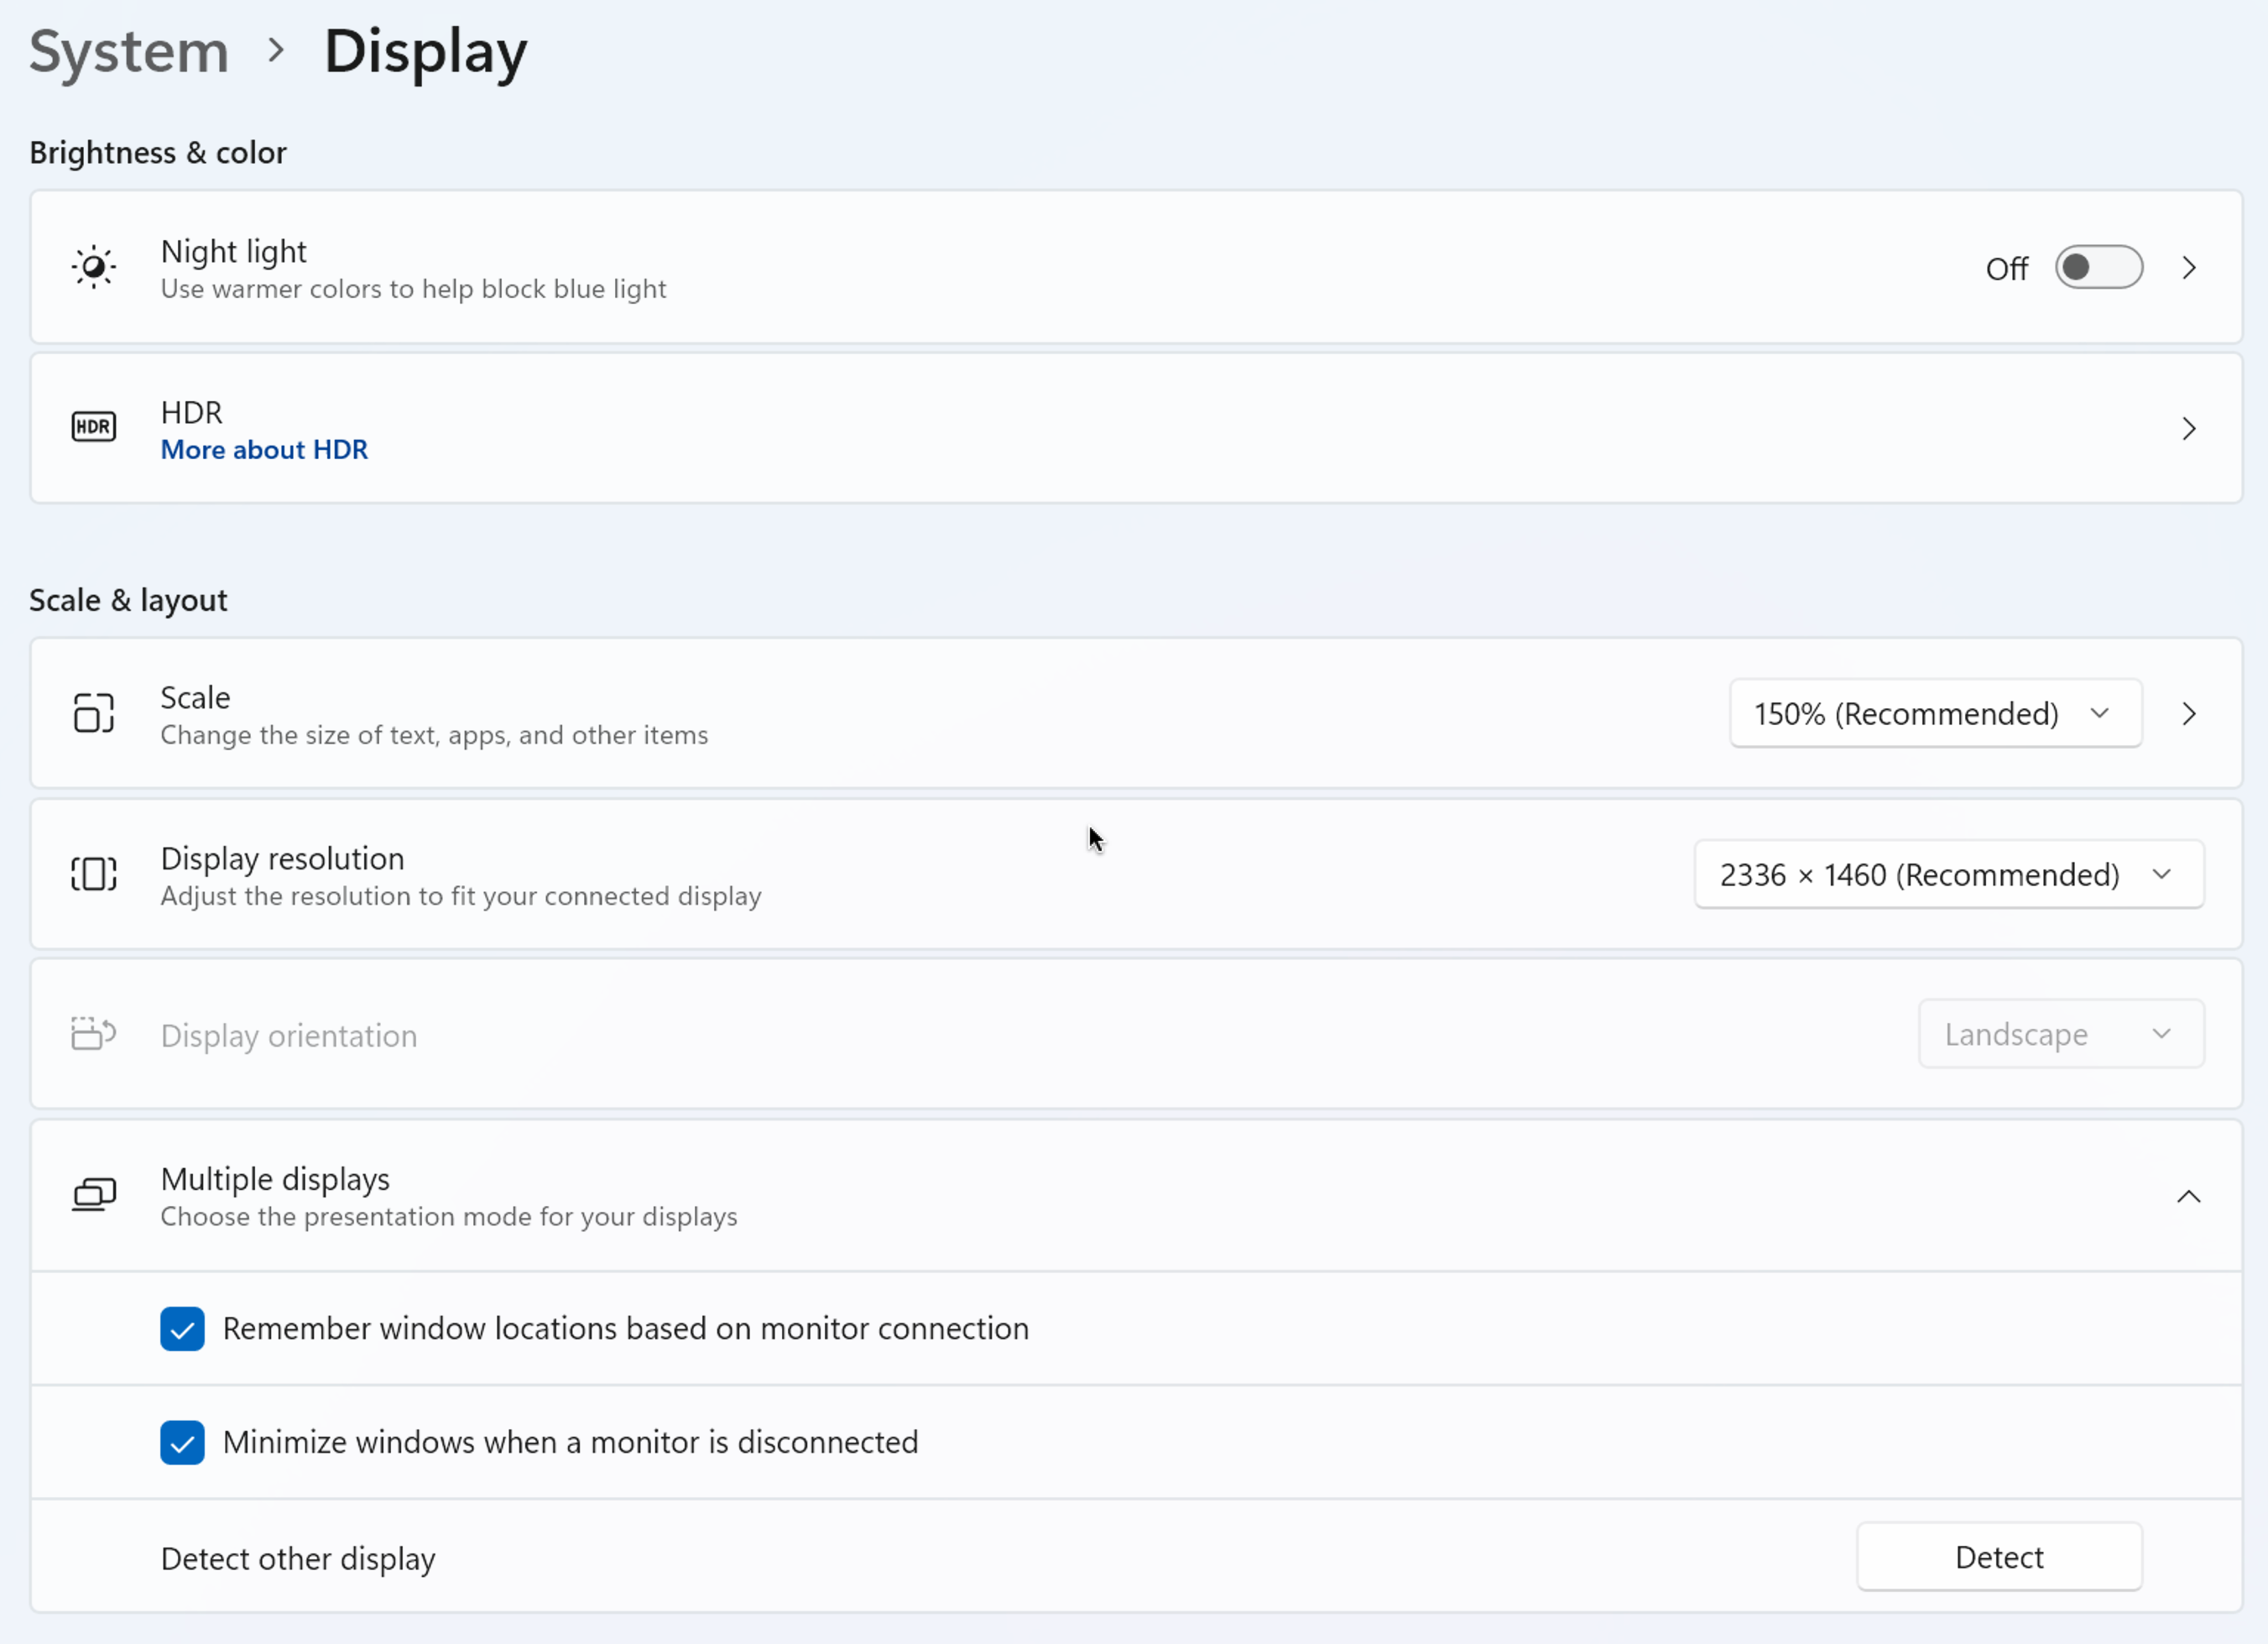
Take a moment to configure your TV so that the resolution, orientation, and positioning are correct. On Windows, you can go to Start > Settings > System > Display to see your display listed and change the resolution, orientation, and how the display acts under the “Multiple displays” drop-down.
If you don’t see your TV listed and nothing shows up, click “Detect” and wait. Once you’ve detected your TV, you can set up the positioning of it, so the display appears in the correct position when you move your mouse.
On a Mac, you can do the same under System Settings > Displays. Click on your TV as it appears in the menu, then choose a resolution, refresh rate, rotation, and toggle HDR mode if available. You can choose between mirroring your internal Mac display (if you have one) or as an “Extended display” to add another output.
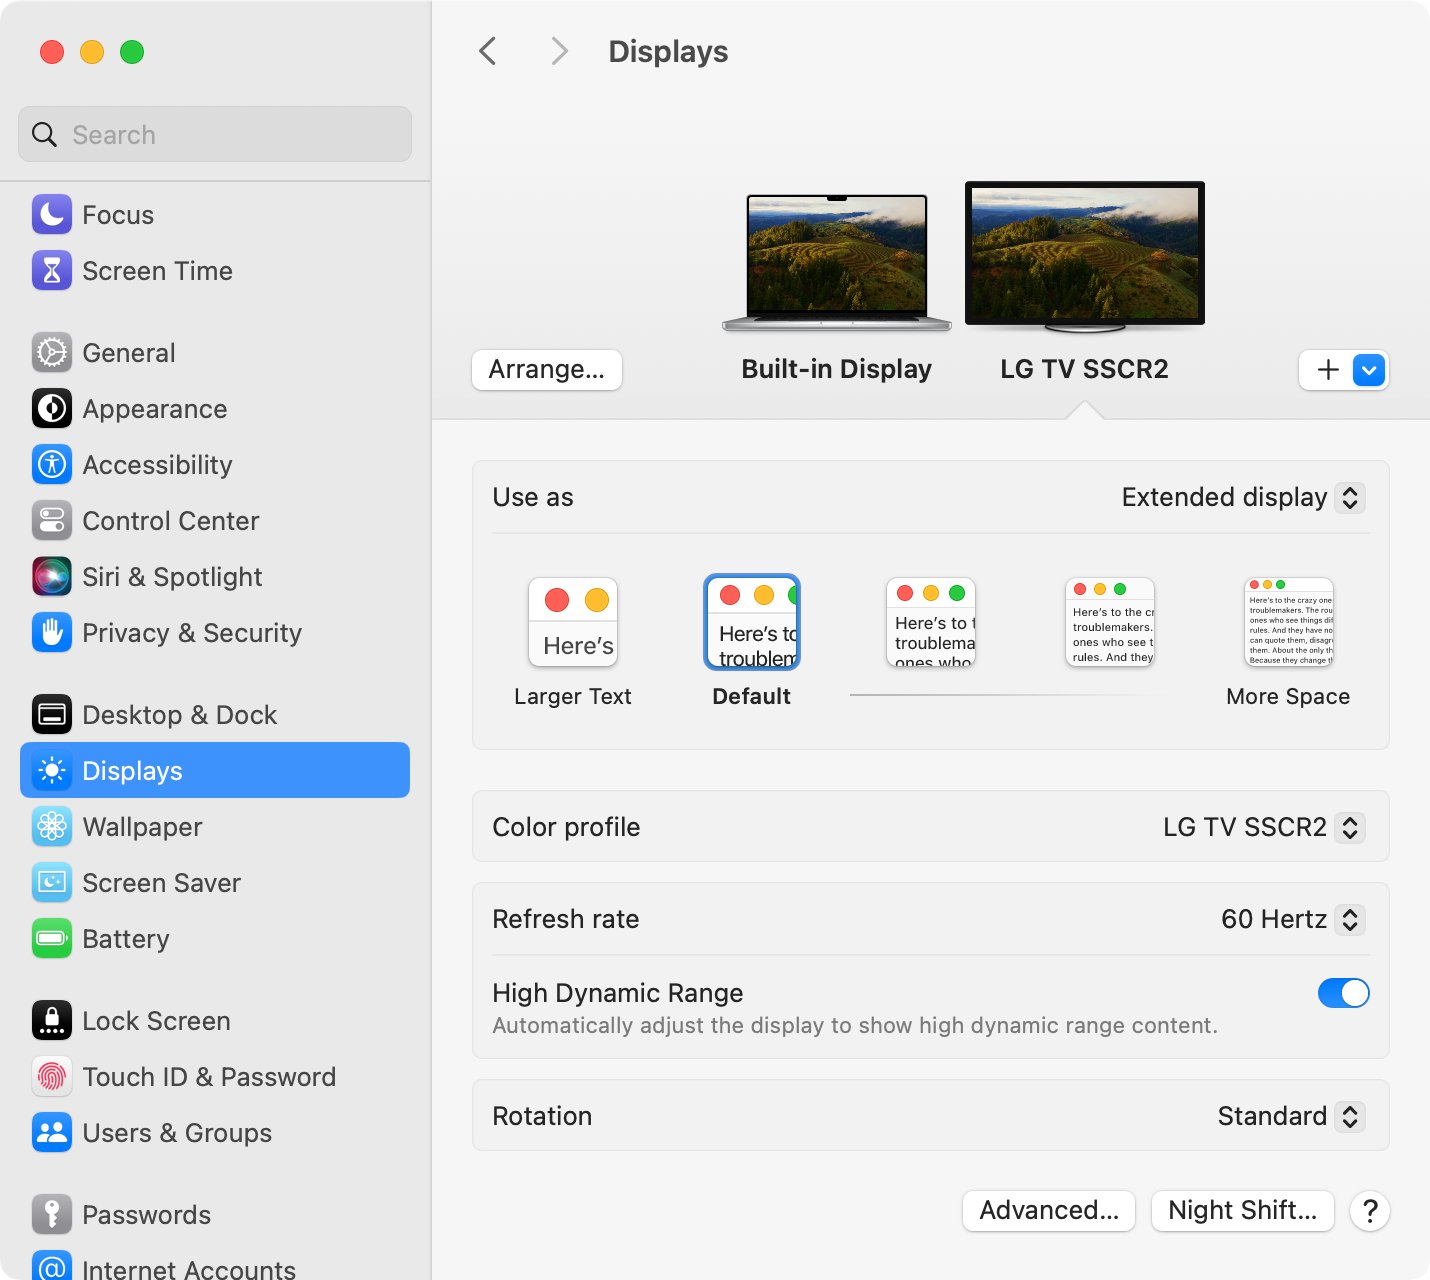
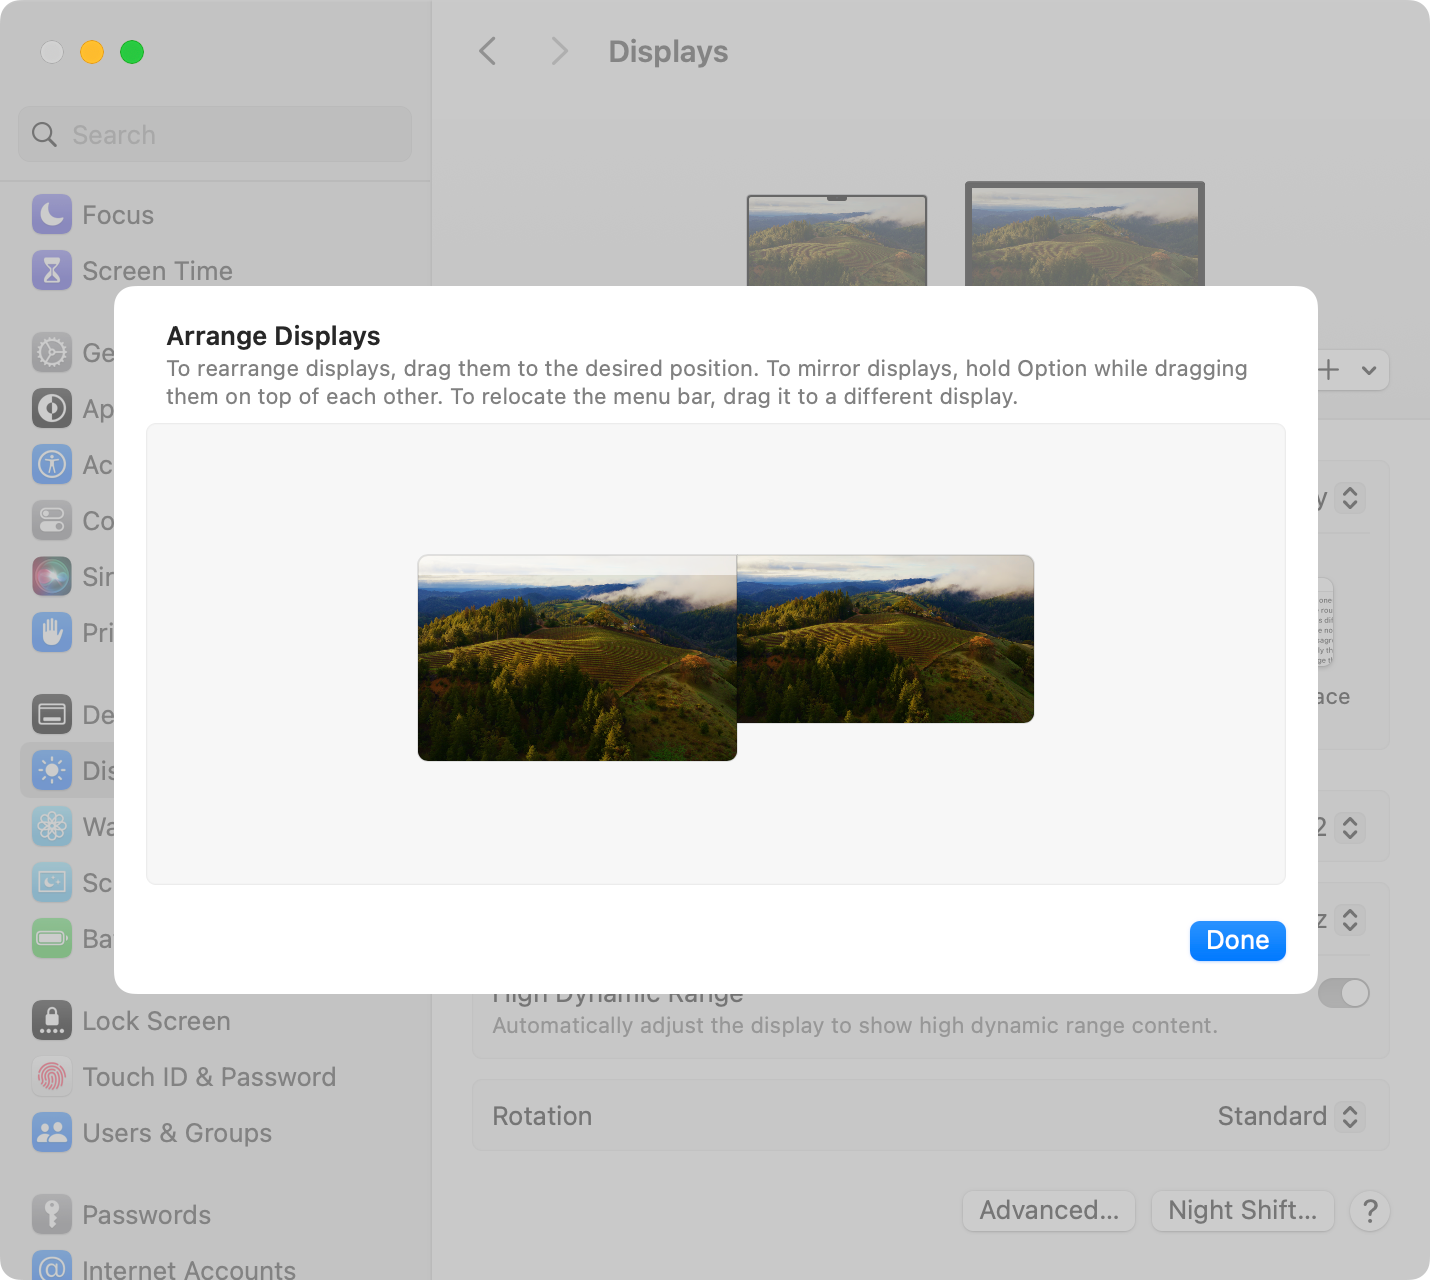
You can reposition your displays by clicking “Arrange” and dragging them into place.
Connecting a Laptop to a TV Wirelessly
Wireless connections are more convenient because they don’t require cables, but they can provide an unstable experience at times. Bandwidth is limited over wireless connections, so image and playback quality may suffer. Interference from nearby devices can also affect these connections.
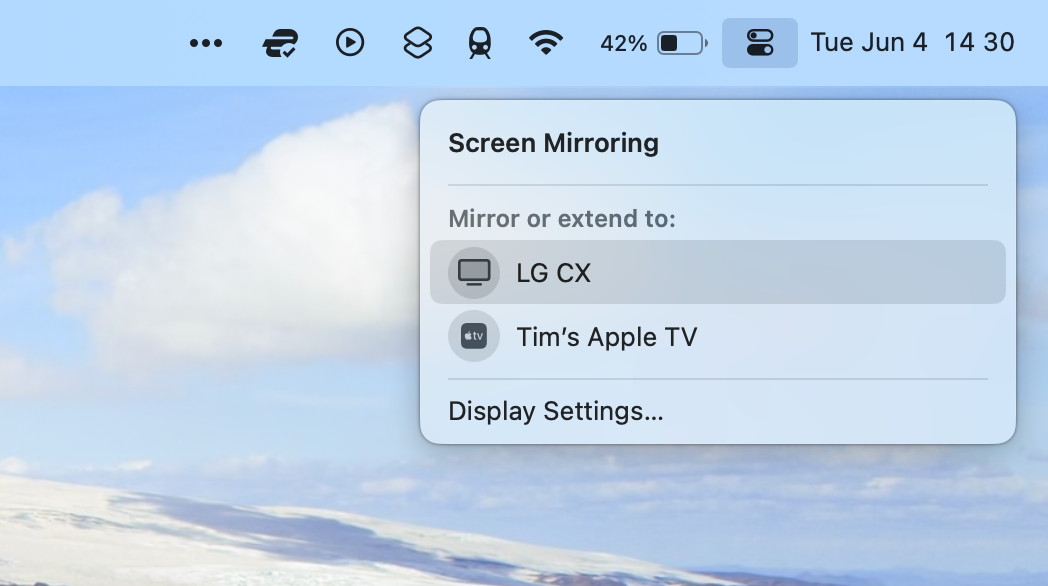
On a Mac, you can use AirPlay to mirror your whole display to an AirPlay device like an Apple TV (the set-top box , not the streaming subscription ). Many new TVs already support AirPlay without the need for an Apple TV.
To make a connection, click on the Control Center icon in the menu bar at the top of your Mac’s screen and select “Screen Mirroring,” followed by the device you want to mirror to.
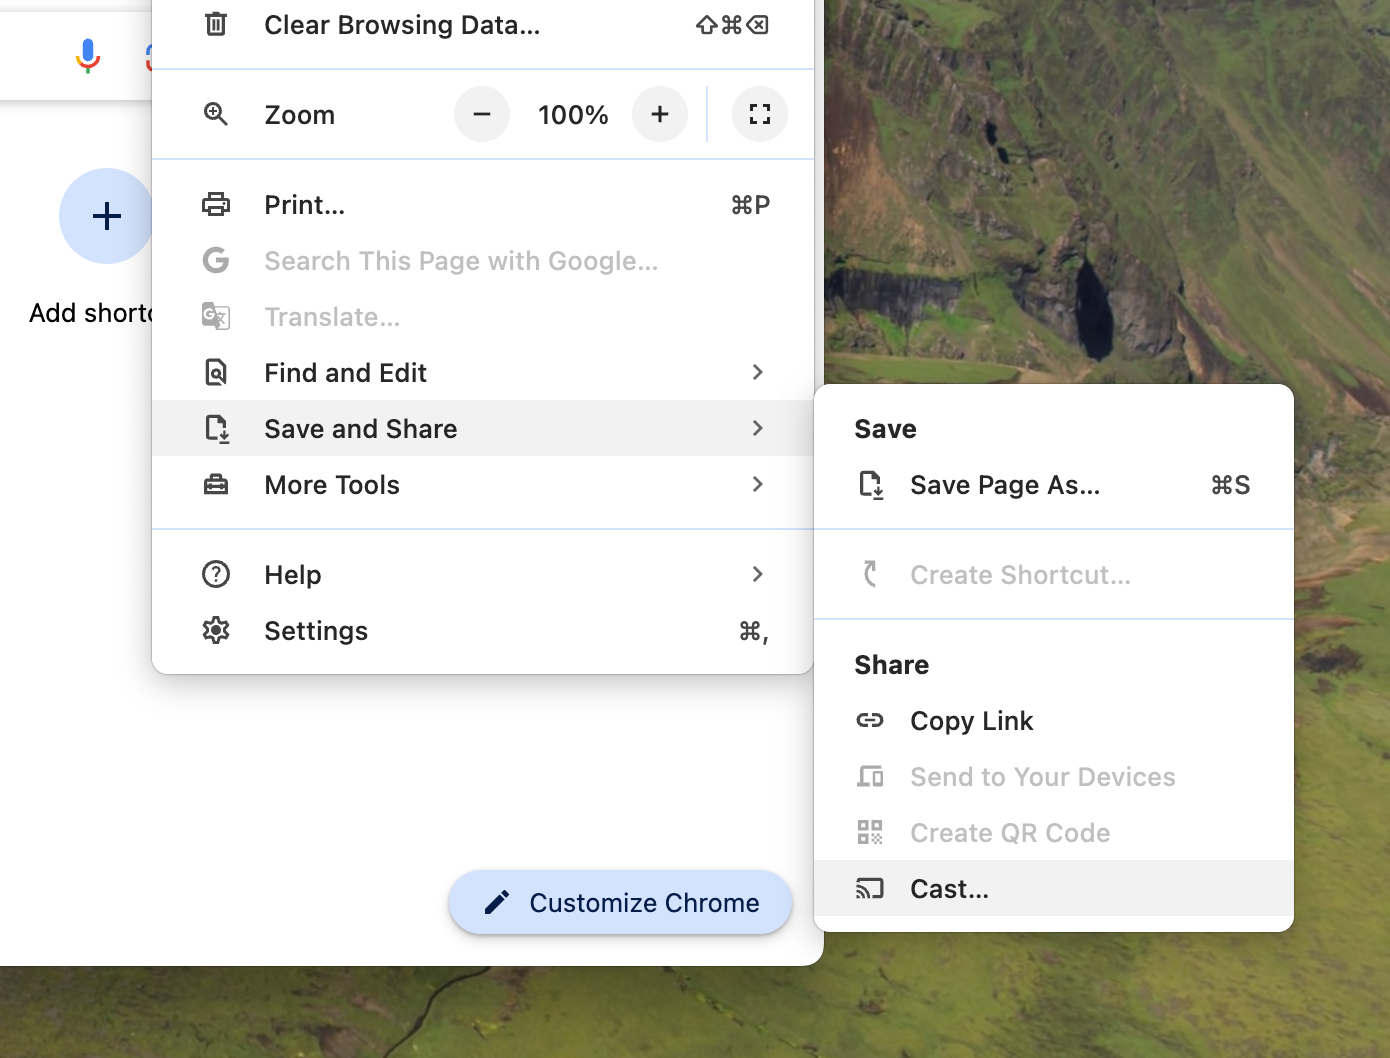
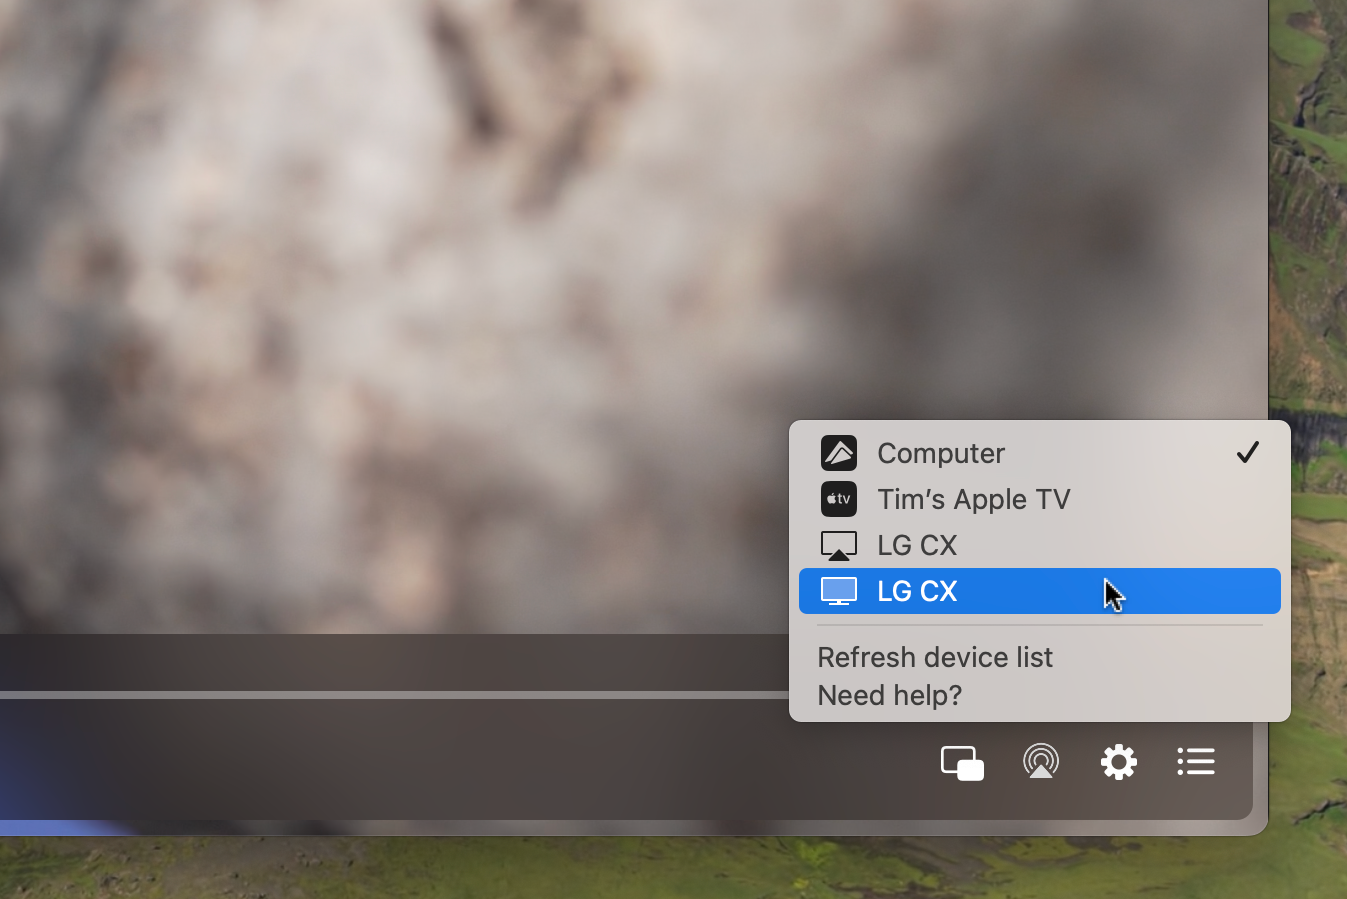
Using the Chrome browser, you can use a Chromecast with a Windows or macOS device to “cast” content from your laptop. This works with browser tabs, Chromecast-enabled sites, and Chromecast-enabled apps. You can cast your entire Windows 11 desktop with a Chromecast or stick to content like tabs and files instead.
To get started, launch Chrome, click on the three dots (More) menu, then navigate to Save and Share > Cast and select the target device.
Another option is to use Intel’s WiDi or the open standard Miracast . Support depends on which TV you have. Some models connect by adding the TV as a Bluetooth device (as per Samsung or Sony ).
Microsoft has its own instructions for connecting to Miracast devices with Windows 10 and 11. The instructions involve using the “Cast” option that appears under the Network icon in the taskbar.
Use DLNA/UPnP for Video Content
If you’re trying to watch video content on your TV using your laptop, there may be a better way to do it than using cables or wireless technology like AirPlay or Miracast.
Streaming media over your local network using Digital Network Living Alliance (DLNA) or Universal Plug and Play (UPnP) is easy and should work fine as long as your network can handle the bandwidth.
Setting this up involves turning on media streaming under the Windows settings or installing an app like Plex , Jellyfin (a free open-source alternative to Plex ) or Universal Media Server instead. You can also use media players like Elmedia Player to “cast” to receivers of your choice.
Set up and configure your “server” to share specific folders, then access them on your TV over the network (often appearing in the “Input” list). Most TVs with Wi-Fi from the last 15 years or so will support this streaming method.
Drawbacks to Using a TV With Your Laptop
TVs have the benefit of size when compared with most monitors. They’re great for watching movies and playing games, and they’re ideal if you’re going to be sitting a fair distance away. If you’ve got a spare TV you want to put to use, plugging in your laptop and watching YouTube or running a few emulators is a great idea.
However, there are some drawbacks. A TV is rarely a suitable replacement for a monitor. Pixel density is much lower on TVs since the panels are bigger and designed to be viewed from a greater distance. This means you’re more likely to be able to make out individual pixels when sitting close.
Text rendering is also generally quite poor on a TV compared to a monitor. This is due to the way sub-pixel layouts differ on TVs. Monitors are specifically designed to make text look crisp, whereas TVs can introduce color fringing which can be unsightly and distracting.
![]()
BrightRainbow/Shutterstock.com
There’s also the issue of size, with many TVs requiring bigger stands that take up loads of desk space. Unless you can wall mount, a large monitor (like an ultrawide ) might be a better choice.
Of course, there are exceptions to the rule. LG now produces 42-inch OLED TVs like the LG C4 that can work well as a monitor, though QD-OLED monitors are a better option for serious gamers. If you’re going to be doing a lot of “monitor work,” like browsing the web or staring at spreadsheets, we recommend a monitor instead of a TV.
Still Want to Buy a TV?
Buy a monitor if your primary concern is extending your laptop over more than one display for productivity reasons . If you’re interested in getting a new TV for gaming or want something for watching movies and other content while occasionally plugging in your laptop, check out our guide to buying a TV .
Alternatively, if you’re shopping for a TV that you want to use with your PS5 or Xbox, consider that your best choice of display could be a monitor .
Also read:
- [New] In 2024, Achieve Flawless Imagery How to Remove Backgrounds on Canva
- [Updated] 2024 Approved Everything You Need to Know About the Firefox Picture-in-Picture Mode
- [Updated] 2024 Approved Harmonizing Highlights How to Add Soundtracks to PowerPoint
- [Updated] Seamlessly Blend Music with Visuals in Premiere Pro for 2024
- [Updated] Social Media Strategists' Guide Top 10 IG Video Editing Apps for 2024
- [Updated] Unlock Chrome's Full Potential with PIP Across Devices
- 2024 Approved Smart Picklist Top Value Free Livestream Software & Apps Reviewed This Year
- 2024 Approved Unveiling the Full Potential of Video Storage in Modern Hardware (64/128GB)
- Experience the Best in Gadgets: Dell Screen, Noise-Canceling Headset, and High-Definition Camera
- In 2024, Beneath the Surface Assessing Huawei P10' Writability Features
- Leading Audio Processors for Cutting the Clutter of Unwanted Echoes
- Quick & Easy Driver Update Process for Your ThrustMaster T150 Gamepad
- Superior Commercial Cloud Vaulting
- Video Editing Mystery IMovie's Automatic Cropping Puzzle for 2024
- YL Software: Premium Korean-Style Purple Background Graphics and HD Wallpapers for Inspiration
- Title: Step-by-Step Instructions: How to Project Your Laptop's Screen Onto Your TV
- Author: Edward
- Created at : 2025-01-22 20:27:44
- Updated at : 2025-01-23 23:01:21
- Link: https://vp-tips.techidaily.com/step-by-step-instructions-how-to-project-your-laptops-screen-onto-your-tv/
- License: This work is licensed under CC BY-NC-SA 4.0.